To learn about setting up the Pre-Marketing Page for your FronTier, you can watch this short video or read the article below.
The first step to setting up a FronTier is by getting in touch.
Contact your Creator Relations Representative or email the team at creator-relations@myminifactory.com and we will give you access to the Campaign feature below.
Step 1 – Create a Campaign
Navigate to the Campaign Builder Interface in your Settings and select ‘CREATE NEW’.
If you have already completed this step or would like to revisit a Campaign editor, select the pencil icon beneath the respective FronTier.
Step 2 – General Campaign Information
From here you will be taken to the Campaign Editor’s ‘General’ Tab. This is where you will be able to choose your Pre-Marketing page background image.
We recommend this image be a neutral/subtle design so as to not disrupt the elements in the foreground of your page. This could be a single color or a simple repeating pattern.
Suggested size: 1920x*1080px, 16:9 aspect ratio
Please note that this image will also be applied to your live FronTier background however this can be changed easily once you go live.
The ‘General’ Tab is also where you will be able to populate your basic FronTier information such as name, description, cover image and duration. More information is available in the How to set up a FronTier Guide.
Step 3 – Populated the Pre-Marketing Page
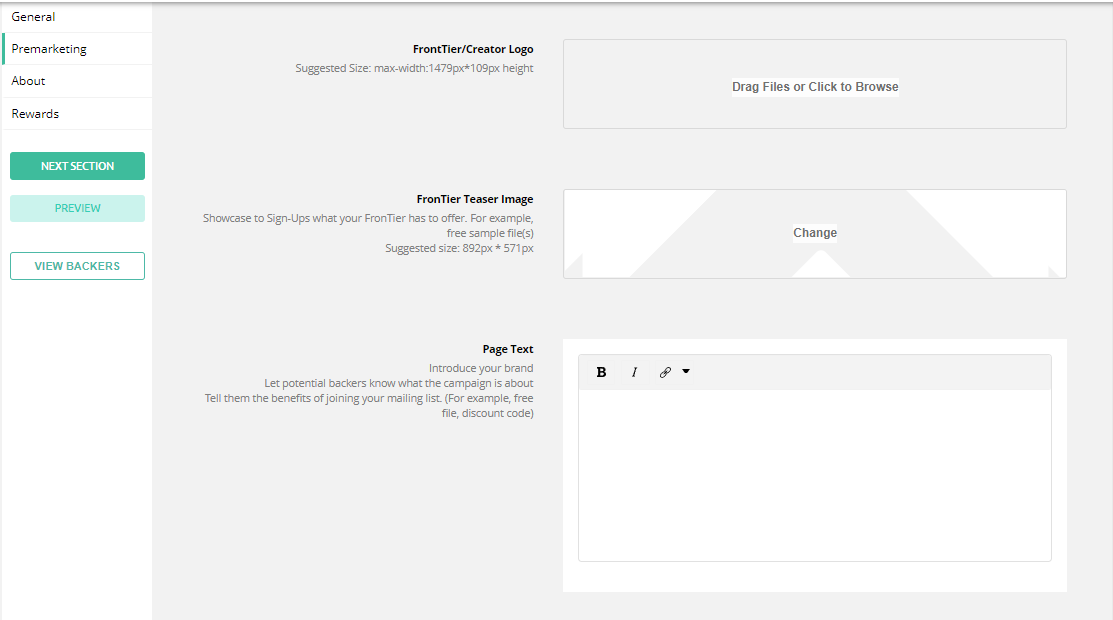
From the ‘General’ Tab you can either select ‘NEXT SECTION’ or navigate to “Premarketing’ on the left. This is where you are able to start adding the various elements of your pre-marketing page which is broken down into:
- FronTier Title Image
This will appear on the top-center of the page
Suggested Size: max-width:1479px*109px height
- FronTier Teaser Image
This is the main image that will appear on the left-hand side of your Pre-Marketing Page. Showcase to potential Sign-Ups what your FronTier has to offer such as any free sample file(s) you’d like to offer.
Suggested size: 892px*571px
- Page Text
Use this space to introduce your brand, inform potential Pioneers about your upcoming FronTier and highlight the benefits of signing up. For example, this could, for example, be free sample(s) to show off the quality you have to offer or a FronTier discount code (learn more about setting up Discount Codes here).
The functionality allows you to include bold and italics text and attach links to your text. This text will appear on the right-hand side of your Pre-Marketing Page.
Upon filling in the details above and selecting ‘Save’, you will be able to check out your Pre-Marketing Page by selecting the ‘Preview’ button that appears on the left navigation bar.
On the preview and live Pre-Marketing page, your profile picture (recommended Creator Logo) will appear in the top right corner of the page and the FronTiers logo will appear bottom-center.
Please note that we recommend including all the elements (Background, Logo, Teaser Image, Page Text) for a successful Pre-Marketing Page.
Step 4 – Going Live
In order for your Pre-Marketing Page to go live and appear on the FronTiers Discovery Page, please reach out to your Creator Relations Representative so that they can review what you’ve created and support you in creating a successful Pre-Marketing Page.
Step 5 – Managing Sign-Ups
Once you’ve input any of the above elements, a new section called ‘Premarketing Page Sign-ups’ will appear.
The number of people signed up to your Pre-Marketing page is shown here.

You will also see a new field where you can input a message which will be sent out automatically once your campaign goes live.

The message will be sent out as both an email and on-site notification to anyone who subscribes to your pre-marketing.
It is automatically sent 10 minutes after xx:00 and xx:30 of every hour (i.e. if your campaign launches at 14:00 GMT, your notification will be sent out at 14:10 GMT).
Setting up a launch notification also creates a referral link, so you can track the conversion of your campaign in your "Analytics" tab.
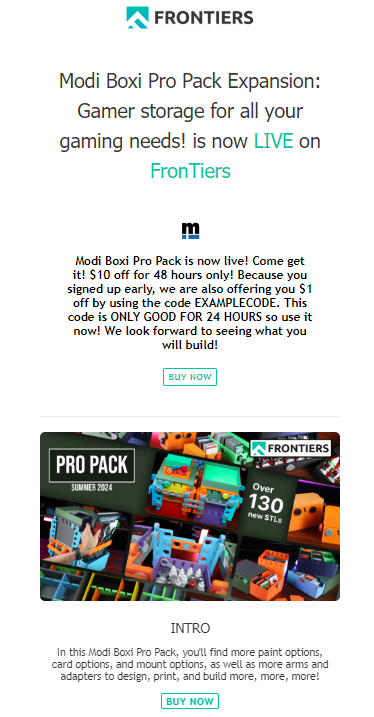
Example notification by creator Mod Innovations
You can share files and send messages to your Sign-Ups by selecting ‘EDIT OBJECTS / USERS’. This will keep them engaged and let them know about exciting touchpoints!
To share files with them please select “Share Objects”.

Warning: Please refrain from adding sub-groups in the Sign-Ups page, as this can cause issues which will hinder your communication with your sign-ups.
To send out messages (including launch notifications) please select all of your sign ups, click “Send Notification to Checked”, then click “Send an Update”.

Now that you’ve created your Pre-Marketing Page, it’s time to begin thinking about building your FronTier. Have a read of the How to set up a FronTier Guide to get started.