With new Creator Profiles, you can give your space on MyMiniFactory a more distinct, personalized feel, with brand-new home, store, Tribes, FronTiers, and community tabs, with branding that reflects your identity as a Creator.
Before you get started setting up your new Creator Profile, it will be beneficial to prepare these materials.
- Desktop and mobile Hero Banners for your new Home, Store, Tribes, and FronTiers Tabs.
- Desktop dimensions - Recommended: 1800 × 600px· Aspect Ratio 3:1 · JPEG or PNG · Max 2MB.
- Mobile dimensions - Recommended: 750 x 1000px · Aspect Ratio 3:4 · JPEG or PNG · Max 2MB.
- Horizontal versions of your Store Page category images - recommended dimensions (1920 x 1080 px).
- Cover images for your Tribes Tiers, Tier releases, Welcome Packs, and thumbnail images for your Loyalty Reward. - recommended dimensions (1920 x 1080 px).
- Any copy or images you may wish to use to update your current Tribes info blocks, to replace current info block used for welcome packs and loyalty rewards.
For a full walkthrough of the new Creator Profile pages as well as details on getting set up, you can watch these two short video or read the article below.
The first video will detail how to set up the new Home, Store, FronTiers, and Community Tabs.
The second video will detail how to set up the new Tribes tab, as this requires a more in depth explanation.
To preview your new profile setup without it being live, follow this https://www.myminifactory.com/profile/{username} and input your username at the end of the URL string.
Note: Are you using your Tribes page as your default profile landing page?
When using the new Creator Profile your default landing page will be your home tab.
We are currently exploring options to allow Creators to use their Tribes tab as their default home tab or to allow you to add more Tribes elements to your home tab.
Follow along with the guide; go to your Store Manager here >
What's New
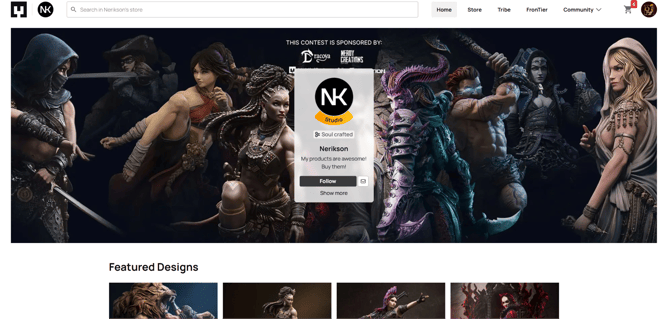
Your new Creator Profile consists of 5 tabs: Home, Store, Tribes, FronTiers, and Community. These have been redesigned with a modern UI and a focus on Creator ownership.
For a full breakdown of the new layout, watch the video walkthroughs above.
How To Set Up Your New Profile
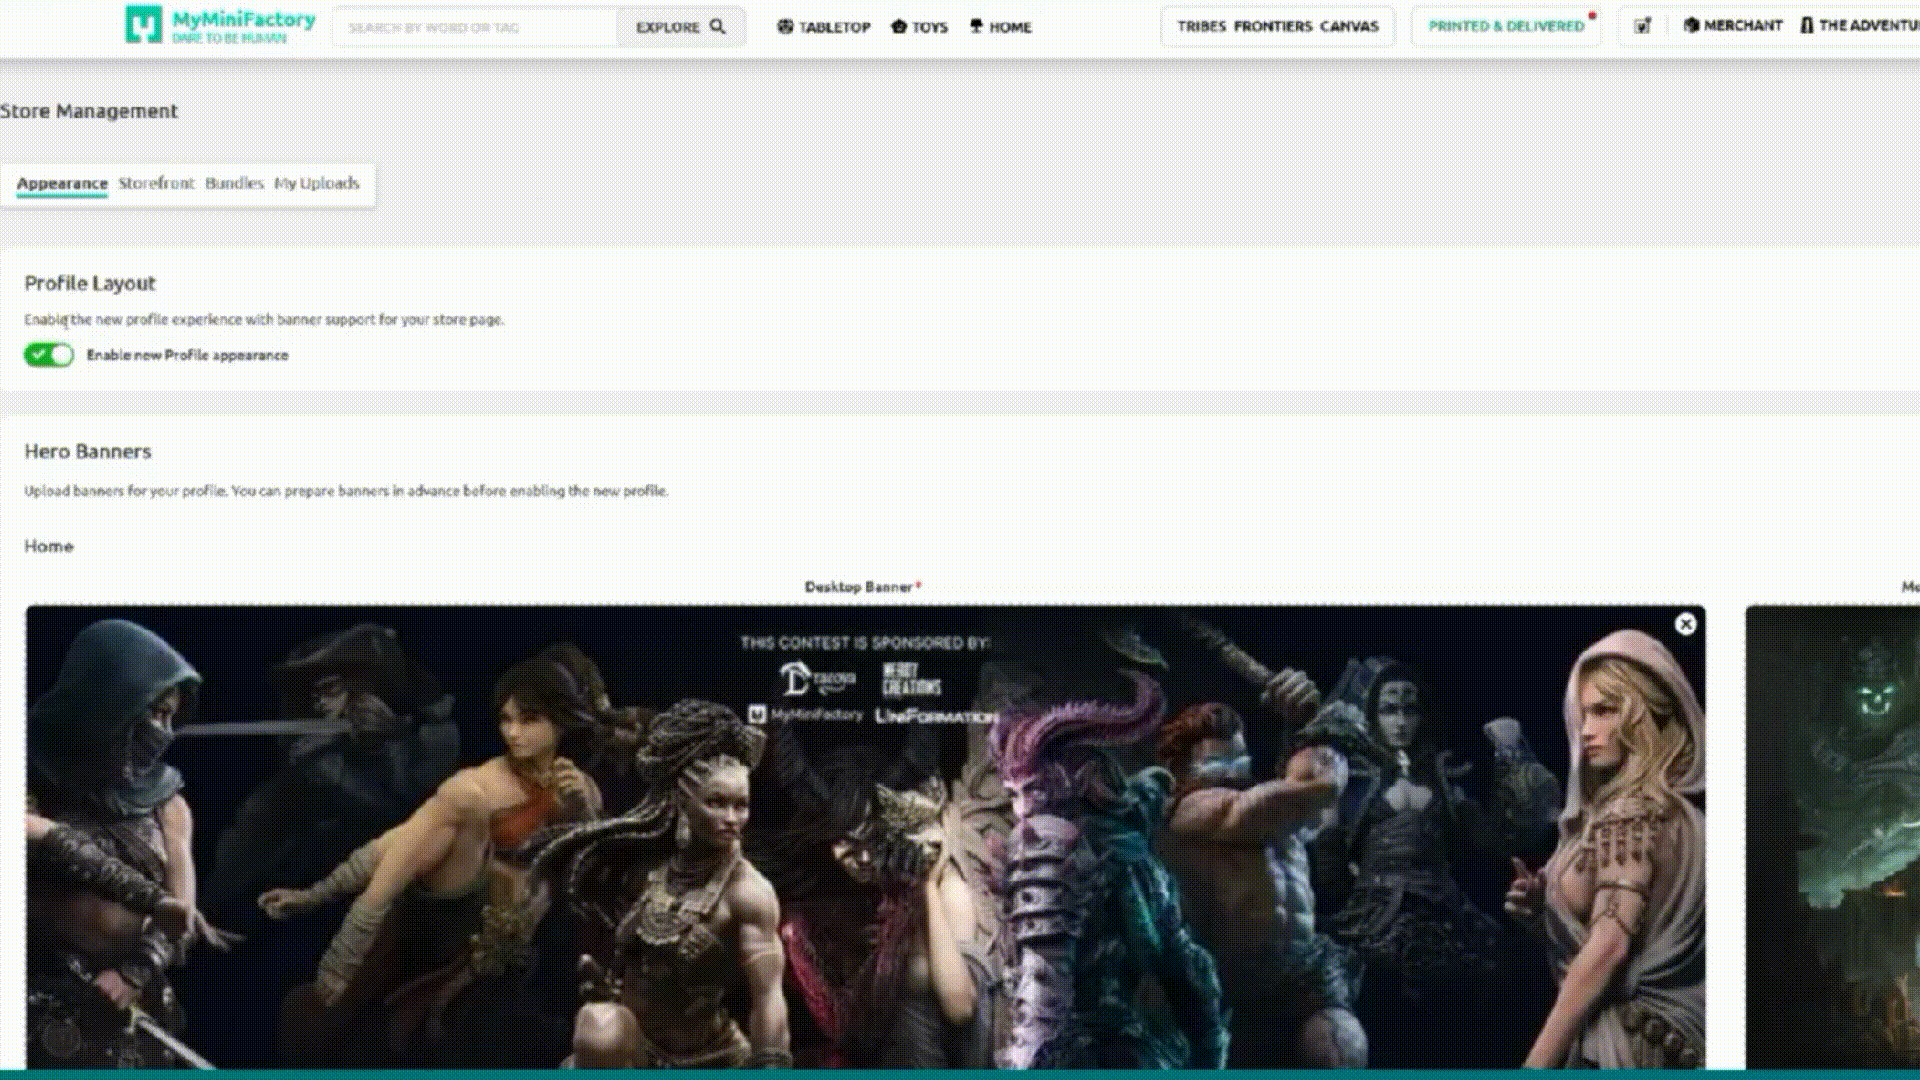
Step 1) Navigate to the Appearance Tab
To access your new Creator Profile settings, go to your Store Manager page. Click on the Appearance tab. At the top of this tab you will find a toggle to switch between the new and old Creator Profile apperance.
You can switch between versions at any time without affecting the functionality of your pages.
Note: You must have Hero banners uploaded to the Home and Store tabs, before you can activate the new Creator Profile.

STEP 2) Upload your Creator Profile Hero Banners
Drag and drop to upload your home tab hero image.
-
Add a desktop version (recommended dimensions: 1800 x 600 px).
-
Add a mobile version (recommended dimensions: 750 x 1000 px).
- Repeat this below for your Store, Tribes, and FronTier Hero Banners.
Note: A mobile banner is not required, but is strongly recommended. If no mobile image is added, a zoomed-in version of your desktop banner will be used on mobile devices.
Make sure to click Save appearance at the bottom of the page after uploading.
Do not toggle Enable new Profile appearance at this stage.

STEP 3) Update your Store Category images
If you are currently using square images for your featured categories, you will need to resize and update them for the new profile pages.
Navigate to the Storefront tab and upload rectangular versions of your category images (recommended dimensions: 1920 x 1080 px).
-
Click the pencil icon on each category image.
-
Select Change Cover and upload your new image.
-
Click Save.

STEP 4) Set Up your About Me section
The copy in the About Me section of your Home Tab is pulled from your account settings. You will need to add a Tagline, and may need to update your description.
-
Tagline: displayed on your homepage About Me preview and at the top of your About Me section.
-
Description: displayed beneath your tagline.
Head to your account settings to update these fields to suit your new Home Tab.
Top Tip: You may wish to revisit this after you have activated your New Creator Profile, to make sure your copy fits well.

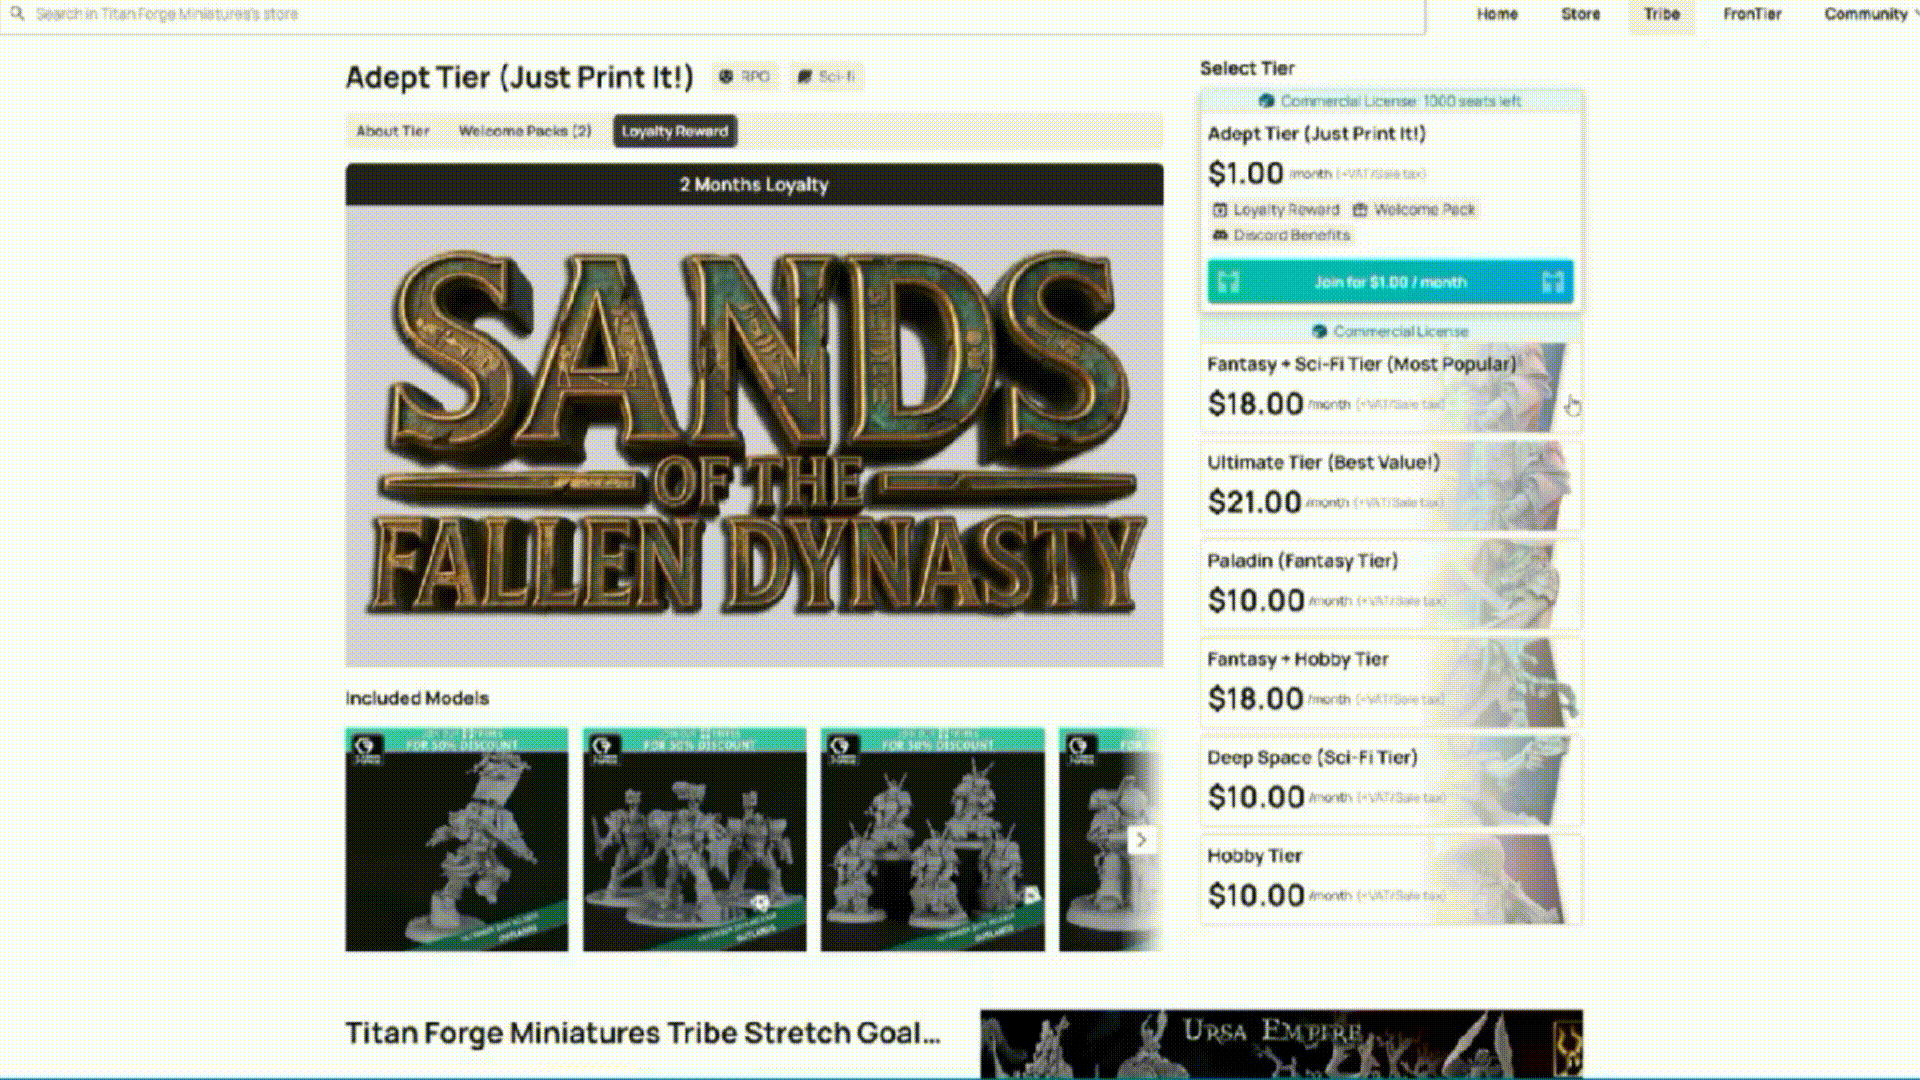
STEP 5) Add Cover Images to Tribes Tiers, Tier releases, Welcome Packs, and thumbnail images for your Loyalty Rewards
The content of the Tiers section on your Tribes tab is displayed automatically and taken from the Tiers and Rewards tabs in your Tribes Admin page. You will need to add cover images to these sections to make the most of the new layout.
For a full breakdown of how these are displayed, please watch the New Creator Profile - Tribes Tab video, at the top of this guide.
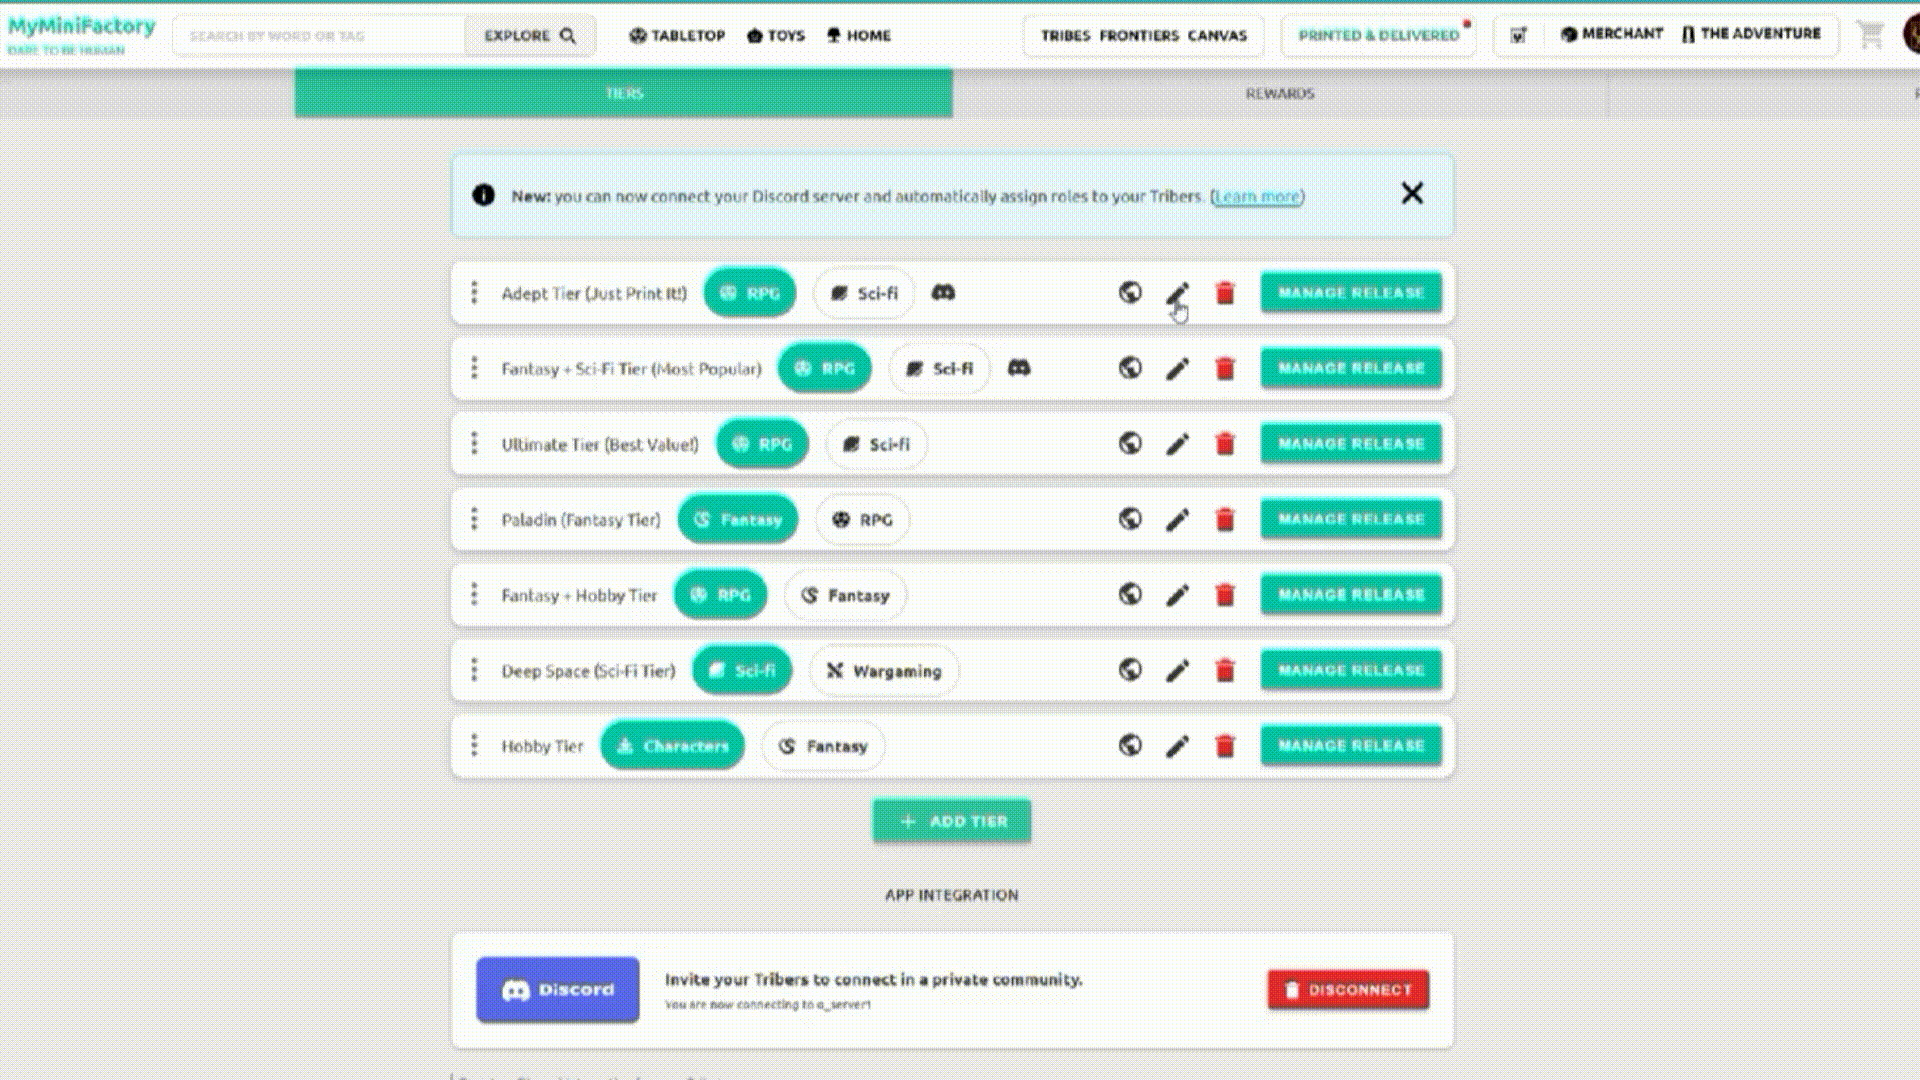
- Navigate to your Tribes Admin Page.
-
Click on the pencil icon next to your first Tier.
- Scroll down to the Cover Image section and drag / drop to upload a cover image for this section. (recommended dimensions: 1920 x 1080 px). Click save once you are finished.
- Next, click on the Manage release button for this tier.
- Drag / drop to upload a cover image for your current release.
Warning: When saving a manage release popup for the current month all attached objects will automatically be distributed.
If you have not already added models and are not ready to distribute your release, you may wish to hold off on adding a cover image for this section until you are ready.
- Click Save once you are finished.
- Repeat this process with the rest of your Tiers, uploading the appropriate Tier and latest release cover images.
- Now repeat the process for your rewards, naviate over to the Rewards tab in your Tribes Admin page.
- For welcome packs you can upload a cover image by clicking on the pencil icon or manage rewards, both of which have the same functionality here.
- For loyalty rewards, please click the pencil icon to upload a reward thumbnail.
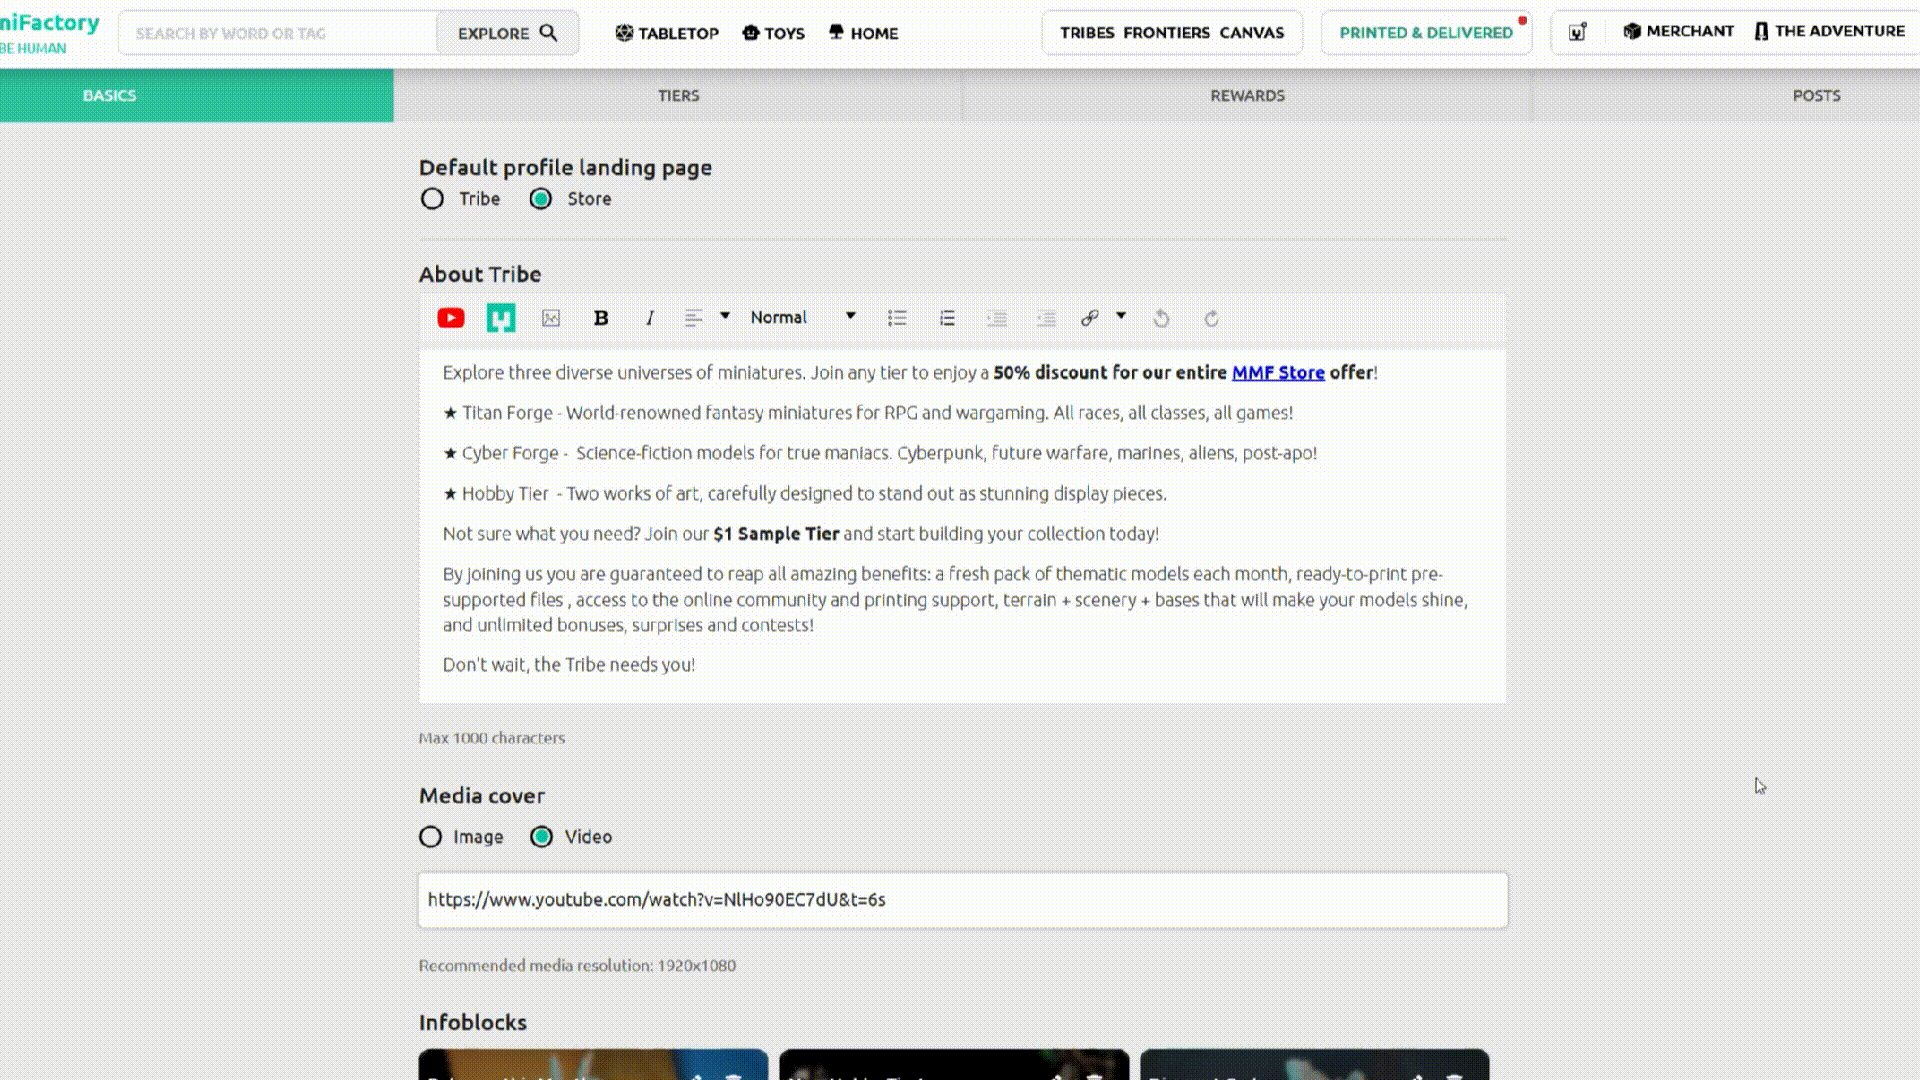
STEP 6) Update your Infoblocks to remove redundant information
Previously, Creators often used infoblocks to display information about their current release, welcome packs, and loyalty rewards. As that information is now taken from your Tiers and Rewards, and is displayed automatically, this frees up your info block for other content.
- Navigate to the basics tab of your Tribes Admin Page.
-
Scroll to the bottom of the page to review your infoblocks.
- Update these sections as you see fit. Instead of information on your welcome packs and loyalty rewards, you could include more about your journey as a Creator, any community content or competitions you may be holding, a FREE try before you subscribe mini, a particular campaign, or more.
- Click save at the bottom of this page once your have finished making your updates.
Step 7) Activate your new Creator Profile appearance.
Finally, navigate back to the Appearance tab of your Store Manager Page, toggle Enable new Profile appearance, and click Save Appearance at the bottom of this page.
You can now browse your new profile pages and make any further updates you like.
Remember at this stage you can easily switch back and forth between the new and old profile layouts while you make further adjustments.