To learn about uploading objects to MyMiniFactory, you can watch this short video or read the article below.
This guide outlines how to upload an Object to MyMiniFactory – the first step to sharing your creations with the 3D printing community.
Archive Mode – for uploading larger amounts of files (archive mode allows 5GB per archive, 25 archives in total). Archive mode does not have 3D viewer functionality. Read more here.
Step 1 – Open the Object Upload Page
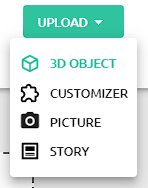
From the ‘Upload’ menu in the top-right corner of MyMiniFactory, select ‘3D Object’. This will open the Object Upload screen.
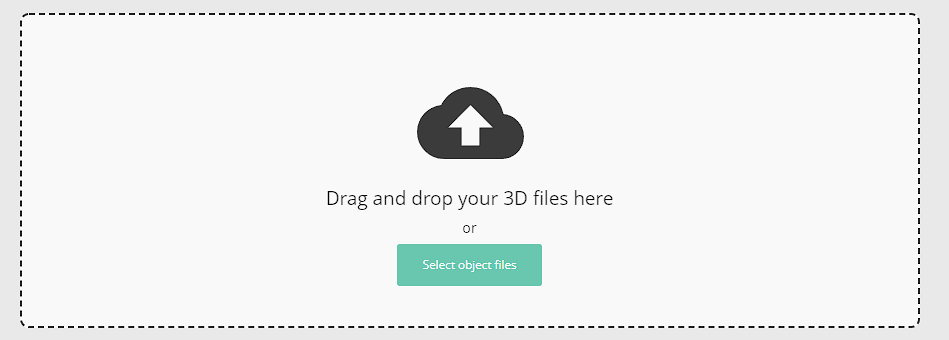
Once the Object Upload Page has loaded, click the grey box to select the files to upload from your computer. Alternatively, you can simply drag and drop the files onto this box, and they’ll be uploaded to MyMiniFactory.
Please note: free Creator accounts are limited to 100Mb per upload. A Premium Creator Subscription means that you can upload up to 500Mb of files. If you require more than that, please email your Creator Relations Representative to discuss upgrading your upload privileges.
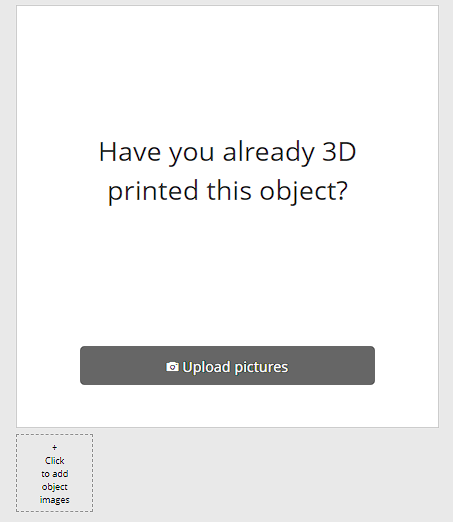
Your Object is uploading to the cloud, and you can now upload photo(s) of the object. To do so, click the grey ‘Upload pictures’ button on the left of the page. This will let you select one or more images to upload alongside the 3D object.
It’s in your best interest to upload a photo of a finished 3D print for any STLs you share on MyMiniFactory. Not only does it show potential customers exactly what they’re getting, but it helps your 3D designs to stand out from the crowd, meaning they’re more likely to be noticed.
With the object and photos taken care of, the only thing left to do is fill in all the details about your object. Moving from top to bottom, these details are:
Name: The name of your object – this will be displayed on the object screen and search results, so make sure the name is both descriptive and memorable.
Tags: In the tags section you can write a series of short descriptors for your object (i.e – ‘sword’, ‘dragon’, ‘car’, etc). These tags will be used as part of the search system, so adding a small collection of related words will help raise the visibility of your object on MyMiniFactory.
Description: This will form the main description of your object – use this to highlight your creativity. Talk about what prompted you to create your 3D design, or the lore behind characters. Feel free also to include links to related designs, building/painting tips and anything else you think users would be interested in such as your Tribe or latest FronTier!
Visibility: This has two settings: ‘Public’ & ‘Private’. Public means the object can be searched and discovered by anyone visiting the site. Private means the object can only be seen by you.
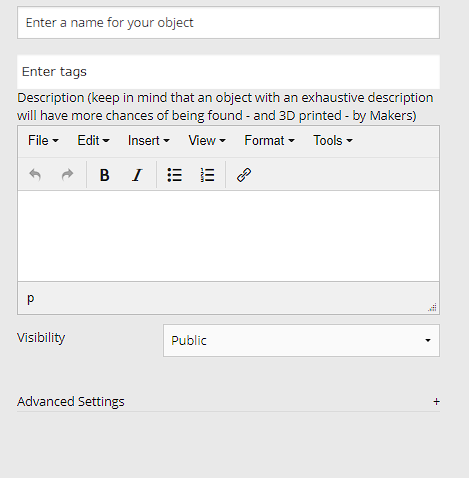
Advanced Settings: Click the ‘Advanced Settings’ link to open up a selection of more specialized optional details, including the estimated time to print and the amount of material required.
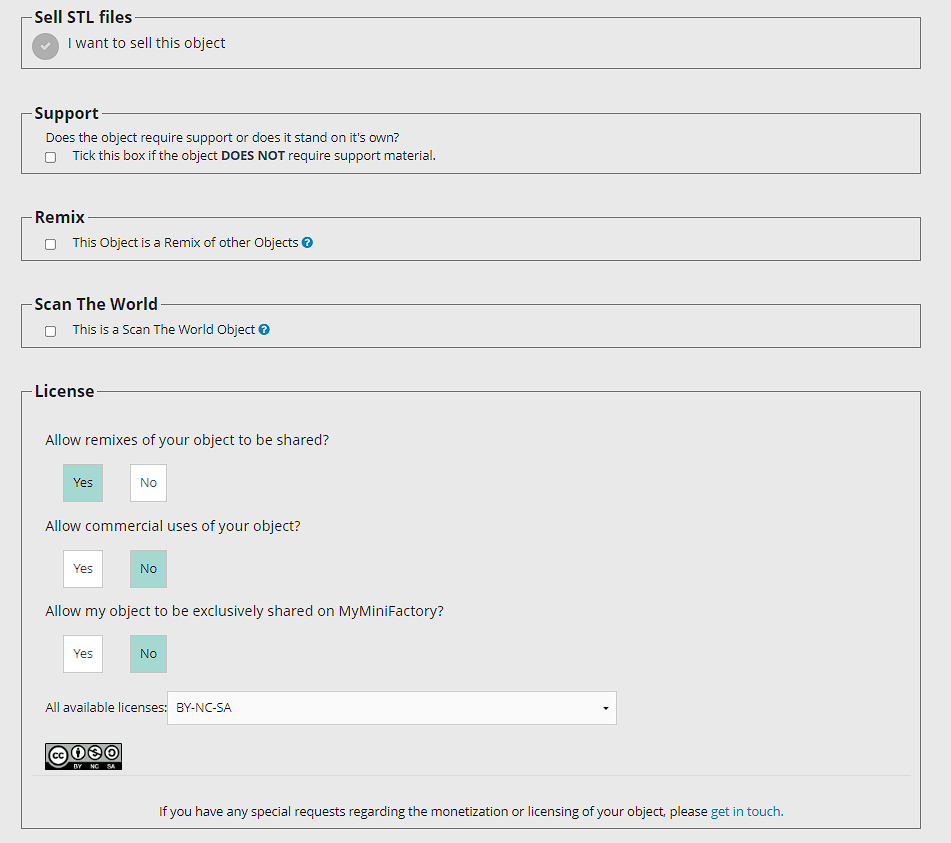
Sell STL Files: This option allows you to sell your object on MyMiniFactory. Clicking the toggle opens a new box, allowing you to set a price for your object, as well as purchase & post-purchase messages for customers.
Please note: In order to monetize an object on MyMiniFactory, you must first have an active Premium Creator Subscription. See the Become a Premium Creator page guide.
Supports: This tickbox allows you to specify whether the design requires supports to build without collapsing.
Remix: Select this tickbox if your object is based on another Creator’s object – they will be credited as the original Creator. Once you’ve selected the tickbox, use the search bar to find the original object, and click the search results to select it.
Licensing: These final options allow you to set specific licensing parameters for your object – whether it can be remixed, whether people can use it for commercial means, and whether it can be shared with other MyMiniFactory users.
Once you’ve filled in as many details as you can about your object, it’s time to submit it for approval!
Simply click the big green ‘Submit’ button at the bottom of the page, and your object will be sent to the Object Approval Team for final checking and approval.
The team checks for numerous things before approving an object, such as:
- Are there valid STL files attached to the object?
- Does it have a photo of the finished print?
- Is the object printable?
- Does it infringe any copyrights or IP? (Only for paid objects)

If the Object Approval Team requires any more input or action from you, you will receive a message. Assuming no problems, your object should be approved and live on MyMiniFactory within 2 working days.